What's It All About

Showing posts with label Winter Wonderland. Show all posts

Friday, January 6, 2012

I'm the First Guest Designer for Crafty and Green

How lucky I am to have great friends that give me the opportunity to be her Guest Designer. Tina's at Crafty and Green's theme for January is Music Madness. As all creative people, we know we start with one idea and our completed project is a totally different concept!!! 


At times like this, I feel like Sophia from Golden Girls - picture this, my second husband was quite musically inclined and had many instruments which he could play. One of which was a Hammond organ complete with Leslie speakers. Now, this organ was in the game room of the house, and the whole house would reverb with music. Now, one of my friends, Suzie, would come over to sew and/or craft. He would be playing his usual music starting with Misty, Autumn Leaves, and then polkas, and of course as Suzie would call it - free skate!!!! Everytime I watch Charlie Brown with the ice skating scene, it brings back the found memories of his music and Suzie saying "free skate". What made this memory come even further to mind is Bitten by the Bug 2 has a challenge using Winter Wonderland ice skate. Well, between the two of these, I have my project for you . . .


Of course, I used the Cricut Winter Wonderland cartridge - this was for the card image cut at 6.00 inches. The actual card is from my Winter Wonder Stack. The back of card oval is scraps. I embossed the card with my Cuttlebug Snowflake folder. The ice skate was cut at 3.75 inches to fit on top of the card with first the silver and then the white. The white part of the skate was embossed using the Cuttlebug Swirl folder. 


The inside of the card, I used a snowflake stamp with blue ink and kept stamping until the stamp is barely seen. There is no sentiment at this time but all I can think of is "free skate"!!!


Well, I hope you enjoyed my ramblings of "free skate" along with my card!!! Thanks Tina again for asking me to be your Guest Designer.!!!!!


God Bless and Happy New Year!!!!
Hugs, Love, and Pixie Dust
Lynne

Friday, December 2, 2011

All About Winter Blog Hop

Welcome to the "All About Winter" Blog Hop!!

We're so happy you could join us for this super-fun hop showcasing cards, layouts and projects that feature everything fun about snow, ice, and cold!!  You'll find an array of ideas throughout the hop -- We hope you'll enjoy each and every project along the way!!

If you've hopped over from Jen, then you are in the right place!!  If you've just popped in to visit my blog or are reading this via email and you'd like to join our All-About-Winter  FUN, then please CLICK HERE to start at the beginning with Lynda's blog!!  Keep alert for blog candy along the way as some hop stops will be offering some goodies...

For the hop today, I've created not one but two cards!!! WOO HOO! Now, I'm not trying to show off but just wanted to give you a great idea to create quick cards for Christmas or any holiday!

JoAnn Fabrics have cards and envelopes in a box and if you get them on sale the price is super as this was purchased after Christmas last year and the Winter Collection was only $3.49! What a deal and there are 24 cards in this box!!!! Sew, with that in mind and a total of 40 minutes two complete cards made with glitz and ready to mail!!!!

My first card, I used Winter Wonderland for the Pencil Snowman and added a few snowflake glitz bling bling including one on his hat with 2 buttons attached with black Stickles to make it look like there's black thread holding the buttons on. The stamp on the inside says "There's no business like "snow business" and "Wishing you a Sparkling Holiday"


Now, look how cute and easy and no one will know - ok, I will and now you will too!!! <LOL>

Now, my second card I saw an elegant card in a magazine that I loved but didn't like the price of the magazine ($14.95 for a magazine, come on now!) Their card was on navy cardstock with white glitter with the word "SNOW" which was all joined together. WELL, if you know anything about me, I see something and go do something a little different - I embossed the front of the card with the Cuttlebug Snowflake cartridge which is more noticeable on the inside than outside! Using the Make the Cut, I made the word "snow" all in caps and joined it together using a blue glittery cardstock in my stash! It looked lonely, sew, I added the blue iridescent ribbon on the side along with an adorable snowman family which were buttons that I cut the shanks off! Just love buttons!!! I used the same stamp on the inside of this card also as it is sew appropriate!


Another easy card that turned out elegant and again, no one knows unless you are going to tell on me!!!!! Please don't tell on me!!!! <LOL>


I'm the last stop along your way today and hope you had a great time hopping with us! Please don't forget to leave a comment as I sew love to hear what you think!!!! Thank you again for checking out my project...  


God Bless
Hugs and Love,
Lynne


Here's a list of the entire hop, in case you get lost along the way or want to revisit anyone (please note that the following links will take you directly to each participants post if you are joining the hop later in the week!!   :-)


(Collection closed)
Link tool by inlinkz.com

Thursday, December 1, 2011

Dashing Through the Snow

I'm such a lucky, honored gal as I'm the Guest Designer for my dear friend Susan and her theme for December is All I Want for Christmas/Holiday Fun!!!. 

I decided to do a card using Winter Wonderland Cricut Cartridge. 


The sleigh is cut at 5-inches while my gallant steed was cut at 4.75 inches. This card measures 7-inches wide. Now, I wanted some dimension for the snow and got a brilliant idea to cut a piece of batting and covered with Silver Stickles and then added glitter to dry on the Stickles. The sleigh and horse were then added on top of the batting with Puff dots. The card was speaking to me and said I need sparkle and glitzy - added some button snowflakes along with rhinestone glitzies!


For the inside, I got creative and wrote a verse for my card and added snowflake rhinestones just to complete the "theme"!

I want to thank Susan for having me as her Guest Designer today and I consider this a privilege!!!! Please be sure to give Susan some bloggie love!!!

God Bless
Hugs, Love and Pixie Dust
Lynne

Tuesday, November 29, 2011

WOO HOO!!! I'm a Guest Designer at 3 Girls Jam!

I am sew privileged and honored to be a Guest Designer today for 3 Girls Jam!!! You sew have to go and check them out as they have the most fabulous ribbons that will be in my budget the beginning of the year not to mention the most fabulous colors!!!!!!!


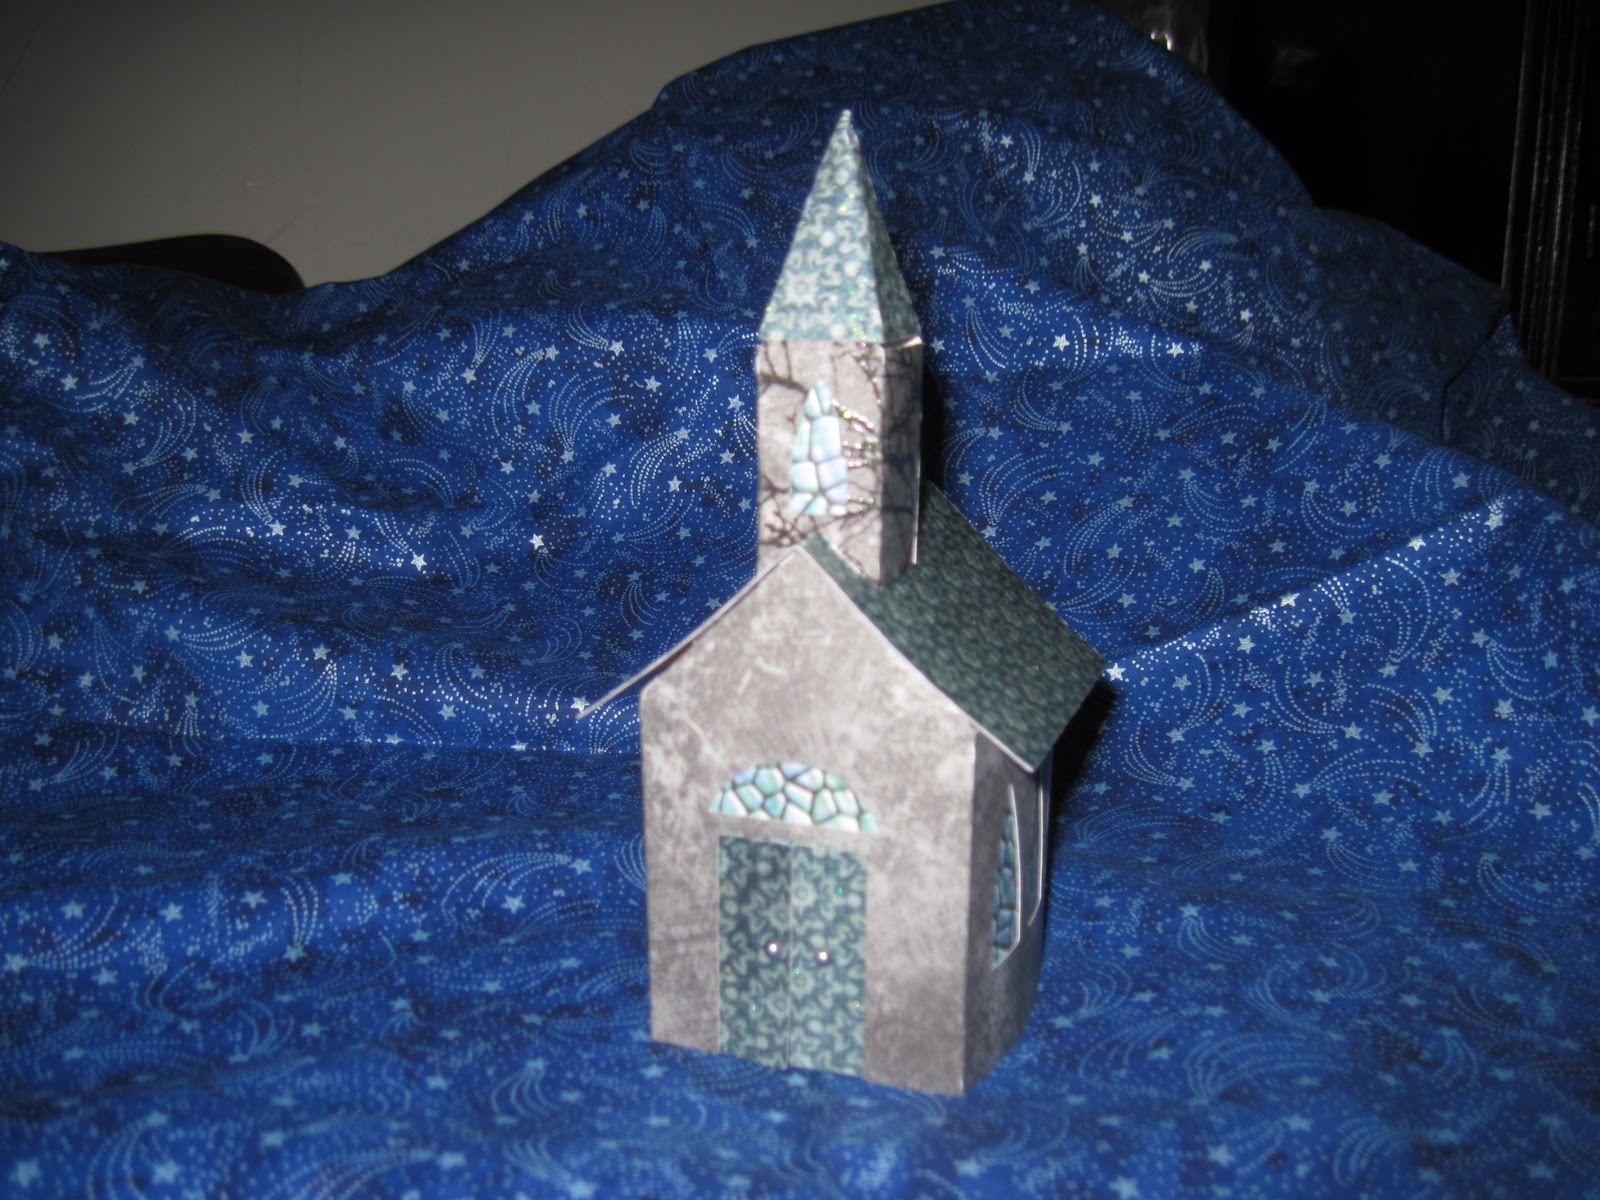
My project for you today is a 3 dimensional project. I find that I love making these kind of projects along with finding myself drawn to them! I must have this self-destruct mode and granted, I have threatened never to do another after my 3 dimensional after my haunted house for Halloween!!! But, yes, I did it again!!!!


The church is from Winter Wonderland Cricut cartridge. It measures a whopping 4-inches tall!!!!! I had a piece of scrap paper to begin my project for the stained glass window. Now to my delight, I have found the inner sanctum of the church is in one piece!!! (YIPPEE!!) The church is from my beloved Immortal Love which I hate to cut into but its purrfect for the sanctuary. The roof, doors, and steeple are all from scrap also! Add a little battery operated light for the inside and it looks beautiful as I was hoping to show with my pictures, but alas, no you aren't able to appreciate the beautiful church as I am while sitting here in my living room! Ok, I may do some of my best writing in the dark!!! <LOL>

Thank you ever sew much for stopping by today --- I know I have a lot of wonderful projects for your viewing pleasure and I do hope you take the time to check out everything!!!!

God Bless!!!
Hugs and Love,
Lynne