What's It All About

Showing posts with label Everyday Pop-Up Cards. Show all posts

Wednesday, June 15, 2016

M-I-C-K-E-Y - It's Luke's First Birthday!!!!

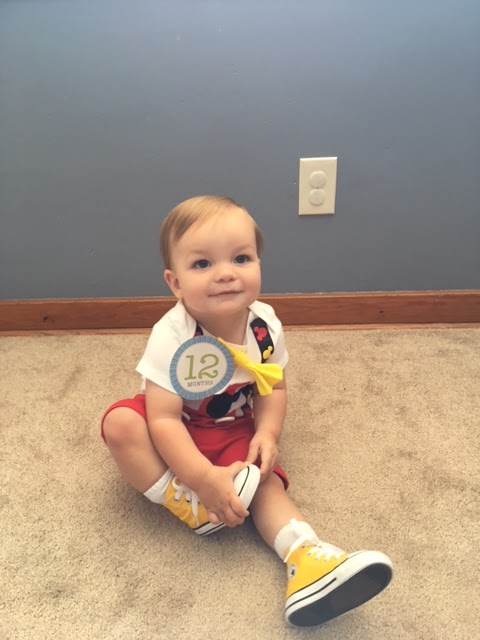
Luke just turned one!!!!! 


Jean and I had a blast making not only his invitations but also decorations for his Mickey Mouse themed birthday party!!! 


The invitation was inspired from Pinterest using Cricut Mickey and Friends Cartridge and cutting a circle for the pants in half and of course buttons from my stash!!!

Also, today, I want to share with you the birthday card I made for him which is another pop-up box card!!! I haven't made one for awhile and then I make two in a row!!! They become addictive!!!! Who knows when I will be making another . . . 


RECIPE and SUPPLIES:
  • tutorial found at Splitcoasters on making a pop-up box
  • Mickey head, stars, and hands were cut using Cricut Mickey and Friends Cartridge 
  • number and name was cut using Essentials which is built in my Cricut Explorer with black shadow
  • all paper is Recollections with black shadow
  • sentiment on the back is my very most favorite sentiment from Create with TLC Happy Birthday to You Digi and Word Art Set with rounded corners, chalked around the edges and mounted on Mickey Mouse paper

Jean is ever sew talented - she baked not only Luke's smash cake but also his birthday cake!! Did I mention it was yummy!!!!


. . . and of course no birthday celebration is complete without showing the birthday boy with his cake!!!!


I appreciate and love reading your comments - is your comment the next one I read??? If you have any questions, you can contact me at hercraftiness@gmail.com.


Much love, hugs, and friendship

Friday, July 8, 2011

Friendships Bloom aka Frustrating Friday!

Well, welcome to Frustrating Friday. First, I would like to state I fought the Cricut Everyday Pop-Up Cards and the Everyday Pop-Up Cards has won! That is until I did a web search for instructions. Would you believe, or those that own this cartridge already know, that there are no instructions on completing the card and the cutting instructions are vague as for the majority black and white without knowing what you are cutting. Now, with that being said, I did a web search and I must give a round of applause and kudos to Obsessed with Scrapbooking as she has done diagrams as to what gets attached and where! This information can be found at
http://www.obsessedwithscrapbooking.com/2011/05/cricut-everyday-pop-up-cards-diagrams.html with a downloadable PDF file to print and put in the cartridge box to save future nightmares! Thank you Joy!!!

Papers that were used was my black from Michael's that they have reams for $3.99 except when there is a sale they are $3.50 each! The card, believe it or not, was not cut from A Child's Year but also on Everyday Pop-Up Cards! The card paper was from a stash bundle from Pat Catans on a discount rack!

I hope you enjoy my project. I think I just may make another tomorrow while things are fresh in my mind at least while I still have my mind!!!

God Bless
Hugs and Love
Lynne

Thursday, May 26, 2011

Everyday Pop Up Cards - Sewing Machine

I just couldn't leave well enoough alone --- was sitting staring at my card and decided it needed just a bit of bling and then I added just a few buttons and this little bow that was found in my button stash!


My hope is to use my cartridges of which I have quite a collection. The first Cricut cartridge that I would like to show is the Everyday Pop-Up Cards and is my most recent purchase. With this in mind, I would like to first comment that this cartridge and I weren't on the best of terms the biggest part of the day and I wish that there had been better directions as to placement but alas through trial and error not to mention the cartridge and I coming to terms - I made this cute little sewing machine Birthday card. The paper I used is the DCWV The Crafty Room with the background paper appearing as practising the different stitches on the machine. The sewing machine was cut from my scrap collection. The Happy Birthday was cut from one of my most favorite cartridges, Hello Kitty Greetings! How the pop-up fits is basically trial and error to get it to the place where it not only opens but folds completely flat! My suggestion would be to fold your pop-up and set inside with just a dab of glue until it fits properly and then mark with a pencil to the position and then and only then glue! One of my worst personality traits is that I always try to add my own personal twist. My own personal twist on this card is a piece of actual fabric 4 x 4 inches with folded little pleats in the fabric and used my Glue Glider Pro to hold the fabric in place. I love my Xyron with lettering and having them as stickers make it so much easier to glue in place and also used that for the brown accent on the sewing machine on the front. Dots were used to attach the front sewing machine and the Happy Birthday on the inside. I hope you enjoy!

Hugs and love,

Lynne